OnCommand® System Manager is the simple yet powerful browser-based management tool that enables administrators to easily configure and manage individual NetApp storage systems or clusters of them.System Manager is designed with wizards and workflows, simplifying common storage tasks such as creating volumes, LUNs, qtrees, shares, and exports, which saves time and prevents errors.
It works across all NetApp storage:
FAS2000, 3000, and 6000 series as well as V-Series systems.
Fast, simple configuration With System Manager, you can rapidly configure NetApp storage systems, typically within minutes after installation. Automated storage discovery further simplifies locating and configuring existing systems.
The management utility is Web based, can be installed on a laptop or server, and runs on either a Windows® or a Linux® environment.
Simplified management
System Manager provides simple to-use, workflow-based wizards to automate the most common device management tasks. A dashboard unifies important system information, and this one view allows management of both SAN and NAS storage.
Real-time system performance is displayed in a single multiframe display, including CPU utilization, I/O throughput, operations, and latency.
OnCommand System Manager Key Features
• Intuitive browser-based graphic user interface
• Easy wizard-driven configuration
• Storage provisioning and disk aggregate management
• Support of all NetApp FAS and V-Series systems
• CIFS, NFS, iSCSI, FC, FCoE configuration in one view
• Flash Pools and Flash Cache
• Content repository / InfiniteVol support
• Capacity-optimized disk shelves
• Snapshot, SnapMirror® , and SyncMirror® management
• SnapVault and SnapLock® technology support
• vFiler® unit and Vserver management
• VMware ESX integration
• Active Directory® and LDAP
• Support of Data ONTAP 7.2.3 and beyond
• Support of Data ONTAP 8.1x operating in Cluster-Mode
• Support for up to 24 nodes
• Secure access via password and RSH
• Secure communications via SSH and SSL
Access the NetApp OnCommand System Manager

You can manage the multiple Filers in a single console.
4 Filers are added in the system manager console.
1. FAS5051
2. FASSENTHIL
3. FASC1/FASC2 ---- Active Active Cluster

You can manage the NetApp Cluster HA Configuration status.

If you click the HA configuration, you will see the status of the filers and Configuration.

Same in check with command line also accessing through SSH.


List the partners in command line.
FASC1> cf partner

List the CIFS Shares.

Check the Network card information and the partner's ip mapped.

Access the CIFS share through windows client.
run \\ipaddress
You can access the myshare

In this share i am creating a new file.


Some maintenance is required for FASC1, so i takeover the FASC1 to FASC2.
Press FASC1 ---- takeover button.

Takeover is processing.


FASC2 takeover successfully.

Check with the command line.

Now access the same CIFS share with FASC1's ipaddress. Because the FASC1 ipaddress is taken over with FASC2.

Now you can access the same CIFS share if the FASC1 is in Poweroff of maintenance Mode.

Check the HA status through the NetApp Oncommand system manager.

Now , if you press the giveback button, then it will start the give back process to FASC1.


Giveback successfully completed.
Now both the filers are in active active connection.

Both the filers are in active state.

Check with the command line also.

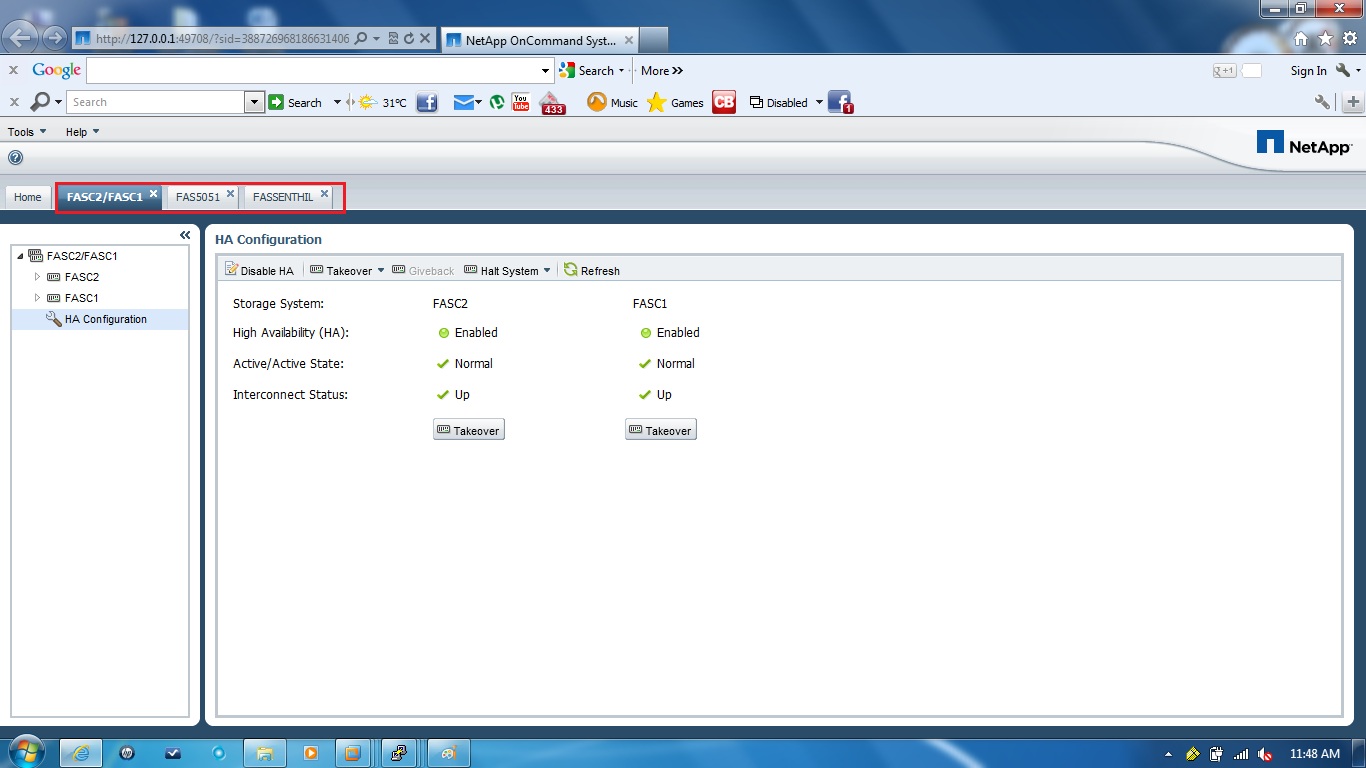
You can manage a multiple filers in a single system manger console.

You can provision a NAS(NFS) storage to ESX/ESXi is very fast.
Click the provision for ESX

Create a new volume.

Add the ESX/ESXi ipaddress or hostname information.

Successfully NFS share created and it will be available at the ESX/ESXi server specified.

Now the NAS share is ready for the ESX server.